The Task Type of each request must be Fulfillment.
o What_does_Upload_Records_do?
o Who_uses_the_Upload_Records_command?
o No_editing_of_requests_after_Medical_Record_attachment
The Upload Records command automatically attaches Medical Records to a request when:
o The Request Status of the request = Ready to Fulfill;
o The Medical Records are saved as a PDF file;
o The PDF file name matches the request’s eRequest ID.
1. The Request Status of eRequest 1085321 is Ready to Fulfill;
2. You use the Upload Record command to upload a PDF file named 1085321.PDF;
3. HealthSource Clarity automatically attaches the PDF as the Medical Records and submits Request 1085321.
You don’t need to open the request, change any data entry fields, or manually Submit the request.
The Upload Records command will normally be used to fulfill requests from Ciox Health Phoenix. It’s not a very practical way to fulfill other kinds of requests.
Personnel who are accustomed to processing these requests already follow a similar “renaming” process to automatically link properly named Medical Records to requests created in other Release of Information applications, like eSmartLog and PRISM.
Upload Records is intended to give those personnel the same kind of tool in HealthSource Clarity.
You can’t open a request after HealthSource Clarity attaches a Medical Record and submits it through the Upload Record process.
If you need to send Correspondence, edit any data entry values, or place a request on hold, do NOT upload a PDF with a matching eRequest ID. If you do, the request will be “gone” before you can do any other work on it.
1. Locate all the requests to which you want to attach records.
|
The Task Type of each request must be Fulfillment. |
2. From the Menu, click Upload Records.
3. The Upload Records screen appears.
4. Make sure each PDF file name matches an eRequest ID for a request with a Request Status of Ready to Fulfill.
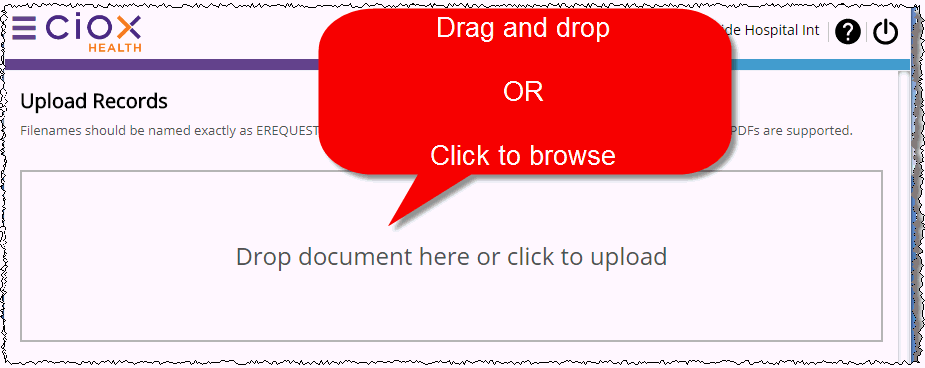
5. To upload files, you can:
a. Drag file(s) from Windows Explorer or your Desktop onto the Drop document here rectangle.
b. Click the Drop document here rectangle and use the Open window to select the PDF file(s).
|
There is no technical limit to the number of files or the size of those files that can be uploaded. However, larger files will take longer to upload. |
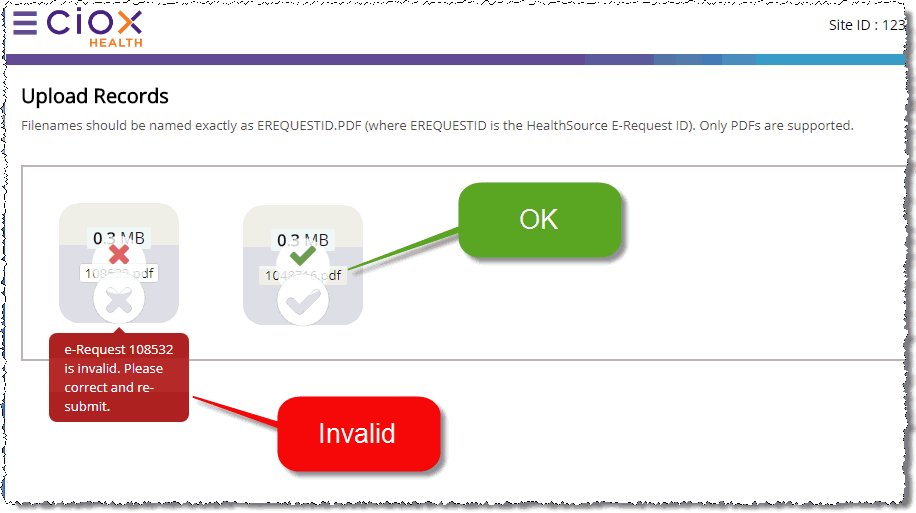
6. HealthSource Clarity validates that the name of the PDF matches an eRequest ID for a Fulfillment request. You’re notified of any invalid files.
7. HealthSource Clarity submits all requests that were matched to a PDF file.